5. Getting started
5.1. Installation
This chapter describes the process of installing a binary version of AGX Dynamics.
The name of the installation executable informs you of the build environment used when building the libraries:
agx-setup-<version>-<platform>-<compiler>-<precision>.exe
For example:
agx-setup-2.30.0.0-x64-VS2019-double.exe
5.1.1. Install AGX in Windows
Start the installation executable.

Fig. 5.1 After the splash screen you will get a verification question (if you have UAC enabled) which will show you a verified installer from Algoryx Simulation.
If you have a prior installation of AGX you will get a query regarding uninstalling that version. It is recommended that you do so.
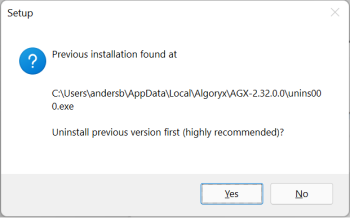
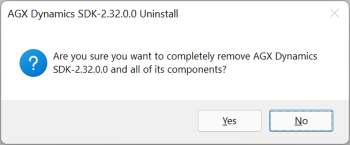
Fig. 5.3 Next is the uninstall window, just press Yes to remove the previous installation.
If you have created additional files, such as CMake, visual studio project files etc, they will not be removed. You will have to manually remove these files.
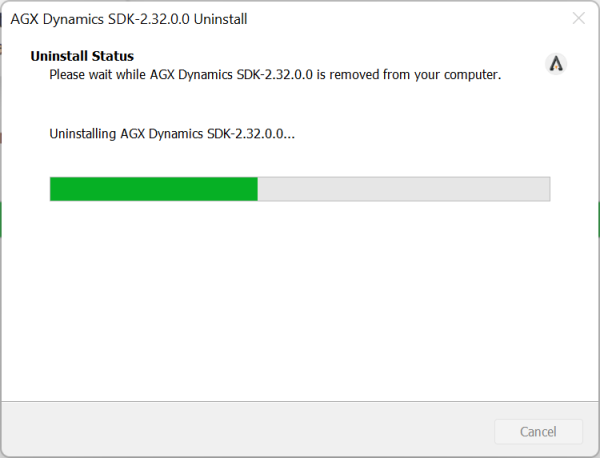
Fig. 5.4 Uninstall window.
Fig. 5.5 Message indicating uninstall is performed. When the uninstall is finished the installer will continue with the installation of AGX.
To continue the installation of AGX Dynamics, you need to read and accept the License Agreement.
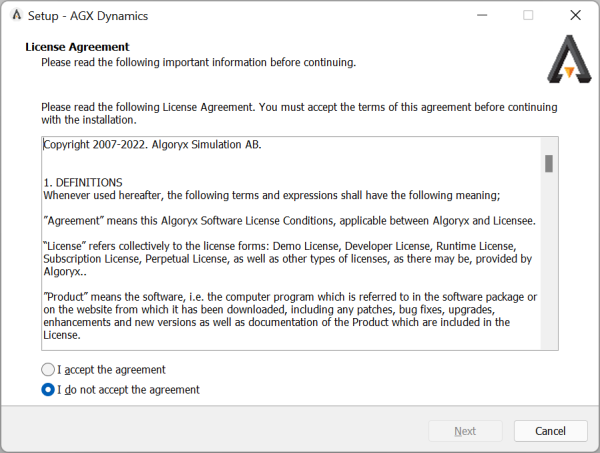
Fig. 5.6 License agreement.
Next is the installation options. Here various options for the installation are listed. If you are not going to utilize the Python API, you can uncheck the “Install python libraries” and leave the download of ROS2 unchecked. If you need to authorize a license, then check the box for “Run the license authorization program?”.
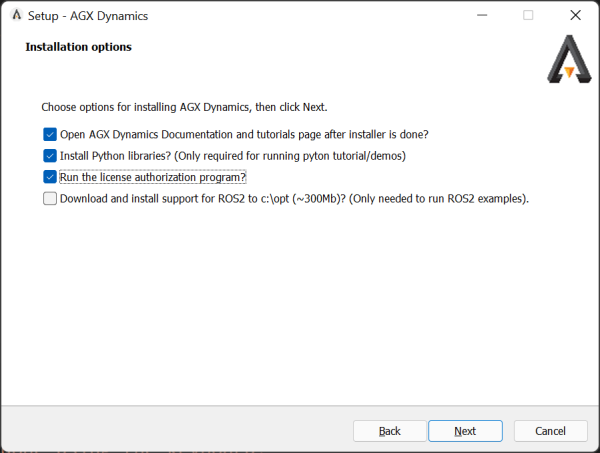
Fig. 5.7 Installation options.
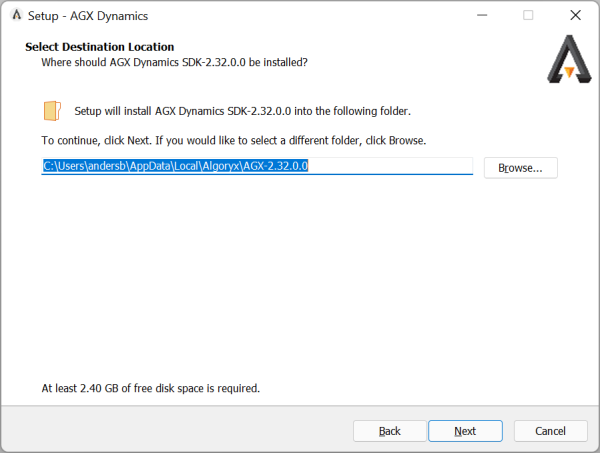
Fig. 5.8 Install destination
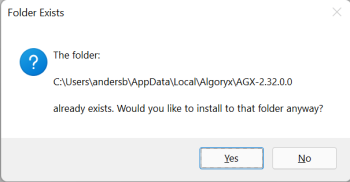
Fig. 5.9 If the target directory exists, you might get a final overwrite verification.
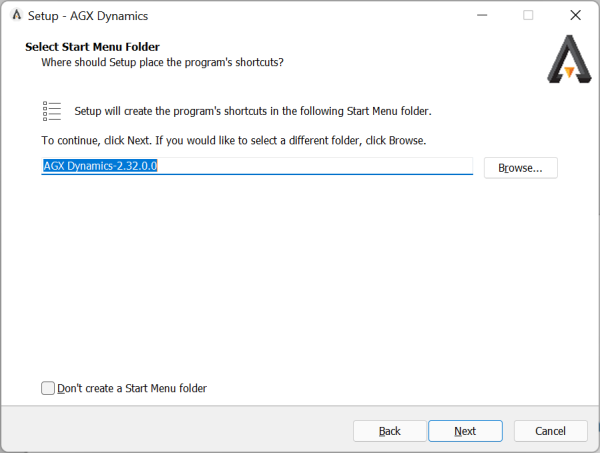
Fig. 5.10 Name of entry in Start menu
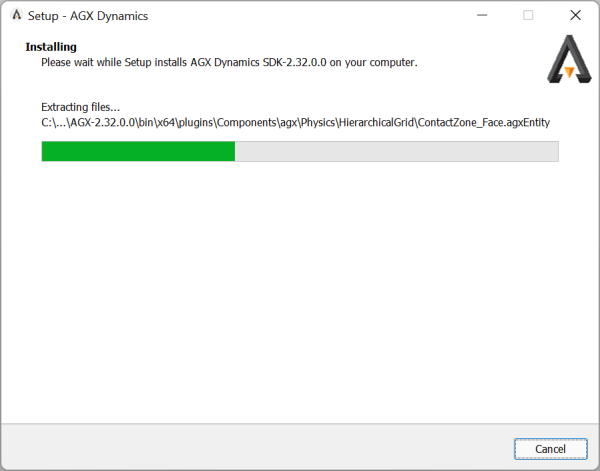
Fig. 5.11 Install in progress.
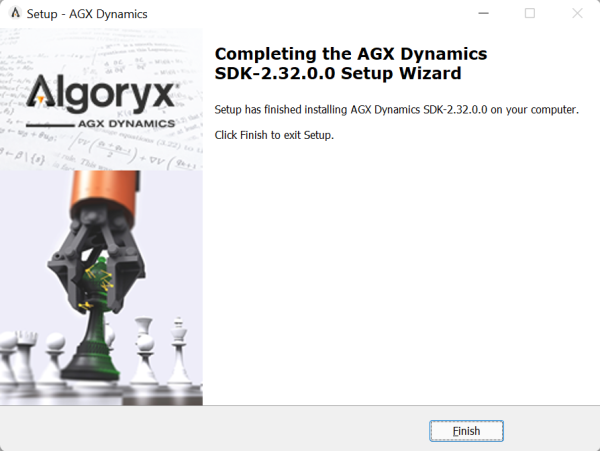
Fig. 5.12 AGX Dynamics successfully installed.
5.1.1.1. Post install
If the option for downloading ROS2 was checked, a progress bar for downloading the complete ROS2 package is shown. After the download is complete, a command window where the files are unzipped will be started.
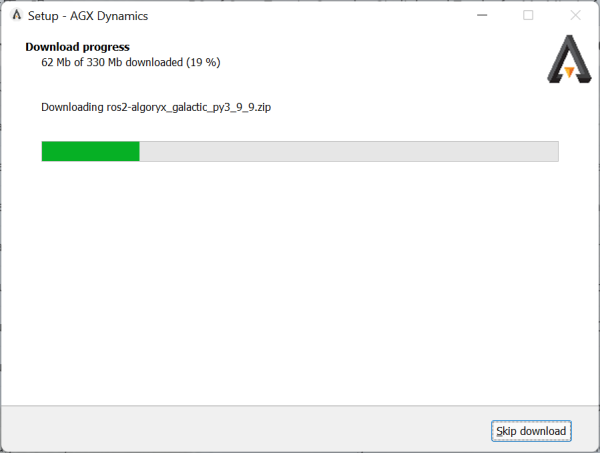
Fig. 5.13 Install in progress.
If the option for the license authorization was checked, a window that shows the license manager will be displayed.
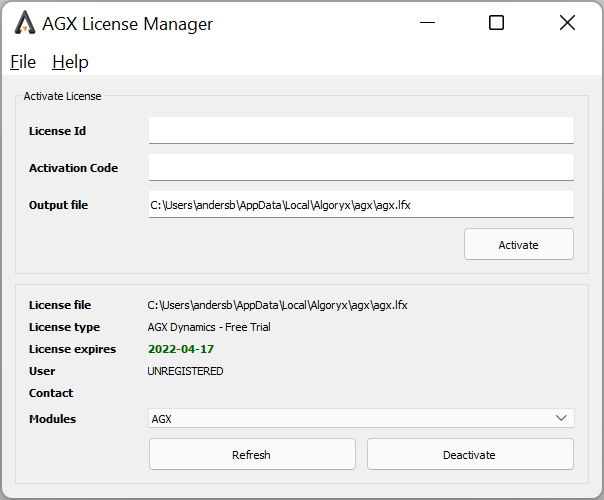
Fig. 5.14 License authorization tool.
If the option for installing python libraries was checked, a command window with the installation will be shown.
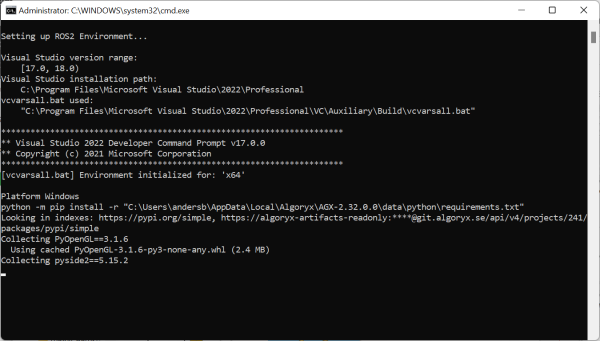
Fig. 5.15 Installing python libraries.
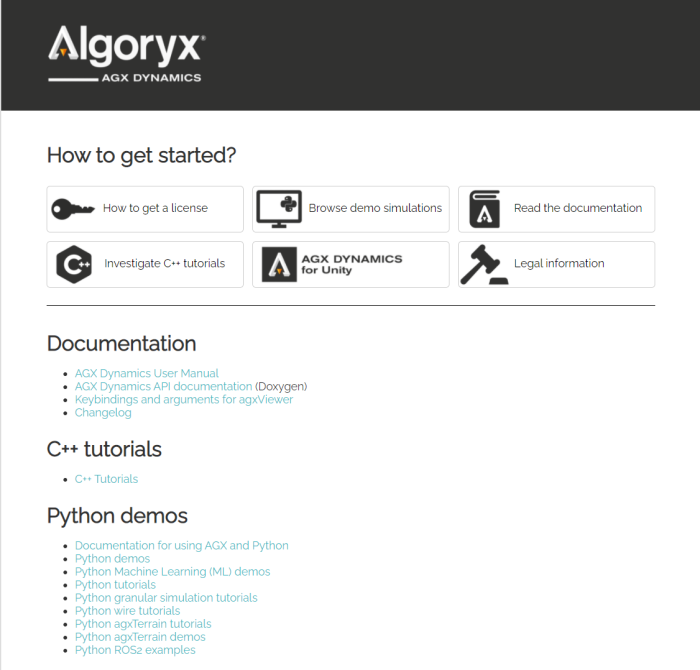
After the installation is done and the option for opening documentation page was checked, the AGX Dynamics startup page will appear with documentation, tutorials and examples.
5.1.2. Install on Ubuntu
Different Linux distributions and versions might have different installation procedures. The procedure described here matches the one used for installing a deb-file on Ubuntu 20.04.
By default, AGX Dynamics is installed into /opt/Algoryx/AGX-<version>
$ sudo apt-get update  # Refresh package lists if needed
  ...
$ sudo apt install ./agx-${AGX_VERSION}-amd64-ubuntu_20.04.deb
      Reading package lists... Done
      Building dependency tree
      Reading state information... Done
      Note, selecting 'agx' instead of 'agx-${AGX_VERSION}-amd64-ubuntu_20.04.deb'
      The following additional packages will be installed:
  ...
      Suggested packages:
  ...
      The following NEW packages will be installed:
  ...
      0 upgraded, 56 newly installed, 0 to remove and 0 not upgraded.
      Need to get 36.8 MB/517 MB of archives.
      After this operation, 2847 MB of additional disk space will be used.
      Do you want to continue? [Y/n]

$ ls /opt/Algoryx/AGX-${AGX_VERSION}/
      AGX_build_settings.txt  LICENSE.TXT  applications     conanfile.txt  include         swig
      CMakeLists.txt          README.TXT   bin              data           lib             tutorials
      CMakeModules            agxOSG       build-info.json  doc            setup_env.bash
You need to manually place your AGX license in the installation directory. Also, before running any AGX simulation the shell environment must be updated with some environment variables. Do this by starting a bash shell and execute the following command:
$ source /opt/Algoryx/AGX-<version>/setup_env.bash
AGX binaries and libraries use embedded rpath information to help locate needed shared libraries. The environment script previously set LD_LIBRARY_PATH but has been updated to no longer do so. If your usecase has trouble finding the needed libraries, the following can be used after sourcing the environment script:
$ export LD_LIBRARY_PATH=$LD_LIBRARY_PATH:/opt/Algoryx/AGX-<version>/lib
You can then start the tutorial applications or load Python scripts using agxViewer:
$ agxViewer data/python/cables.agxPy
The Linux package also install desktop files which most window managers will find automatically. Via these desktop files, the window manager will show menu options in the development section which help locate AGX API documentation, the user manual and the tutorials/demos.
5.1.3. Install on macOS
To install AGX on macOS, right click the downloaded installer file, select Open and follow the instructions. The installed AGX environment will be available in /opt/Algoryx/AGX-<version>.
To use AGX with python, you must have Python3.9 installed on your machine, using the homebrew package manager
$ brew install python@3.9
You need to manually place your AGX license in the installation directory. Also, before running any AGX simulation the shell environment must be updated with some environment variables.
Do this by starting a bash shell and execute the following command:
$ source /opt/Algoryx/AGX-<version>/setup_env.bash
You can then start the tutorial applications or load Python scripts using agxViewer:
$ agxViewer data/python/cables.agxPy
5.1.4. Installing license
To learn how to use the license system, please read chapter Section 6.1.
5.2. Building your first application
AGX utilizes CMake for setting up a portable build environment. In the directory tutorials, there is a sample CMakeLists.txt which can be used as a template for building applications based on AGX. This chapter explains how to build the tutorials from a binary release of AGX on various platforms. It describes how to setup the include and library paths and which libraries are necessary to build an application based on AGX. First, make sure you have the correct libraries for your target platform (32/64 bit).
Note
AGX Dynamics is built with RTTI and exception enabled. Integrating AGX Dynamics into an application without having features enabled might cause runtime problems such as crashes or undefined behaviour.
5.2.1. Setting up a runtime environment
Note
To be able to execute an application using AGX Dynamics you need make sure you have the correct setup environment variables set. The AGX Dynamics runtime directories are not added to the PATH by default.
The AGX Dynamics installation comes with script/bat files for setting up the runtime environment. In Windows the file is named setup_env.bat and in Linux/Mac: setup_env.bash. These setup files will initialize environment variables needed for AGX Dynamics to run properly, including PATH, AGX_FILE_PATH etc.
5.2.1.1. Windows
For the Windows platform there are a few ways of getting a correct environment:
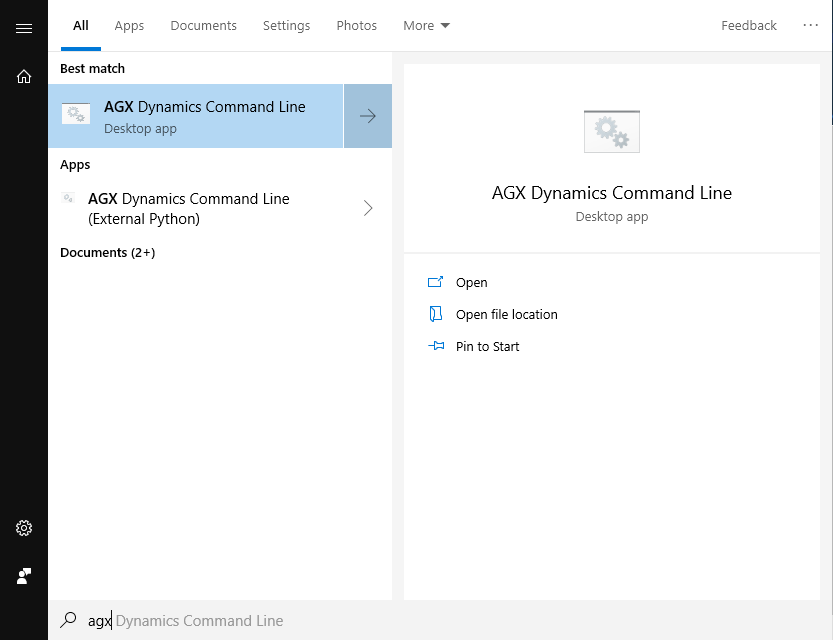
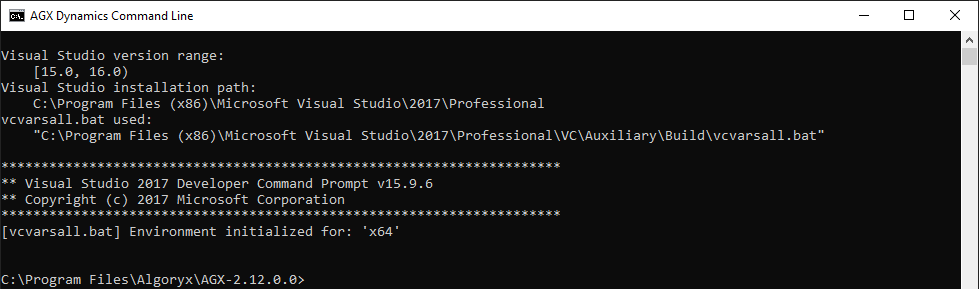
In the START menu, there is a AGX Dynamics Command line shortcut. This will open up a cmd prompt with the correct setup. By default it will utilize the internal Python interpretator. See Section 46 for more information on how to use a pre-installed Python together with AGX Dynamics.
If you want to start an application such as Matlab, Unreal Editor or Unity with a correct environment for AGX Dynamics, you can use the agx_cmd.bat which is located in the AGX install directory. The example below will properly initialize AGX Dynamics environment and start the specified application.
"c:\Users\username\AppData\Local\Algoryx\AGX-2.33.0.0\agx_cmd" "c:\Program Files\Unity\Hub\Editor\2019.3.5f1\Editor\Unity.exe"
5.2.1.2. Linux/macOS
To setup a working environment for the Linux or macOS platform you need to execute the script setup_env.bash that comes with the AGX Dynamics installation. You will find this in the installation directory.
$ source /opt/Algoryx/AGX-2.33.0.0/setup_env.bash
$ agxViewer data/python/cables.agxPy
5.2.2. Windows/Visual Studio
AGX for the Windows platform is built using Visual Studio with runtime libraries from MultiThreaded DLL (MultiThreaded Debug DLL in the debug version). When you build your application, it is also important to link to the correct version of the libraries (debug/release), as it is not recommended to mix the two in the same application. AGX for windows is delivered with both debug and release libraries (see below).
Attention
By default, the installer will install AGX Dynamics into a user directory, c:\Users\username\AppData\Local\Algoryx\AGX-2.33.0.0. This results in that you can change/add/remove files from the installation directory as you like. If you choose to install AGX Dynamics into another folder, for example c:\program files\Algoryx\ you might need to have administrative rights to change files in the folder. The below instructions assume you have full access right to the AGX Dynamics installation path.
When building the tutorials which come with AGX, the following steps have to be followed to build in-source (in the installation folder):
Install cmake (https://cmake.org) Make sure you have CMake in your PATH (there might be an option for that during the installation).
Start an AGX Dynamics Command Line: Press the START button and type AGX (and it should appear if you are running Windows 10 or later).
Create an empty directory somewhere on the disk and make it the current directory.
Execute the command cmake-gui (make sure you have CMake in your path) and supply the AGX installation directory as an argument:
cmake-gui %AGX_DIR%Press configure and select the correct generator (VS2019, VS2022; 64 bits) that matches your installed AGX Dynamics binary distribution. If not, you will get linking or runtime problems.
Change CMAKE_INSTALL_PREFIX to “.” (just the dot).
Press Generate and close cmake-gui.
Start Visual Studio with environment variables from setup_env:
devenv /useenv agxBuild.slnBuild the solution
Building the project INSTALL will copy the files to the folder earlier given by CMAKE_INSTALL_PREFIX.
Now you should be able to run and debug the tutorials. Select one of them (e.g. tutorial_cable) as a StartUp-project by right-clicking on it in the solution explorer, and choosing “set as StartUp-project”.
Run externally with ctrl-F5, or debug it with F5.
Additional options can be passed via right-click in solution explorer –>properties–>debugging–>Command arguments. One option would be -p in order to start the simulation in paused state (press ‘e’ to toggle paused state while running).
Below is a session where the tutorials are prepared for building:
First, start a cmd window with the AGX Dynamics environment setup. You can either start your own cmd window and execute the setup_env.bat that exists in the AGX installation path. Or you can start one from the START menu:
Which of the two you choose, depends whether you want to use the embedded Python environment that comes with AGX, or your own (version compatible) Python installation.
c:\Program Files\Algoryx\AGX-2.33.0.0> mkdir d:\temp\buildAGXTutorials
c:\Program Files\Algoryx\AGX-2.33.0.0> pushd d:\temp\buildAGXTutorials
d:\temp\buildAGXTutorials> cmake-gui %AGX_DIR%

Fig. 5.17 Press Configure and select generator
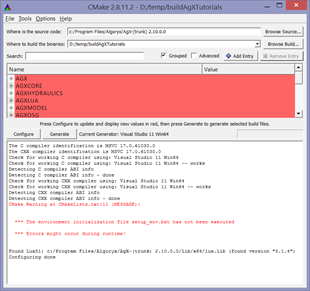
Fig. 5.18 Warnings might occur if setup_env.bat is not executed.
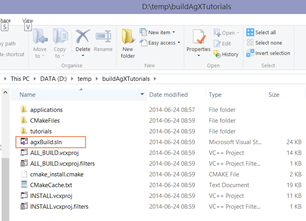
Fig. 5.19 agxBuild.sln is the resulting solution file.
d:\temp\buildAGXTutorials>
d:\temp\buildAGXTutorials>dir Release\tutorial_bodies.exe
d:\temp\buildAGXTutorials>Release\tutorial_bodies.exe
d:\temp\buildAGXTutorials>set PATH=%PATH%;c:\Program Files\Algoryx\AGX-2.33.0.0\bin\x64
d:\temp\buildAGXTutorials>Release\tutorial_bodies.exe

d:\temp\buildAGXTutorials>Release\tutorial_basicSimulation.exe
      AGX Library 64Bit AGX-2.33.0.0 Algoryx(C)
      Basic simulation tutorial
      --------------------------------


Creating a simulation
Creating a body
Adding body to the simulation
Step system 3 seconds forward in time
Shutting down AGX

d:\temp\buildAGXTutorials>
If an AGX Dynamics application is started without the correct path you might get an error message regarding missing runtime libraries:
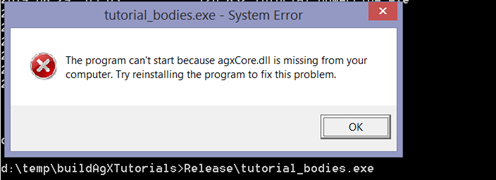
Fig. 5.20 Starting an AGX application without correct PATH.
5.2.2.1. Building HelloWorld in Windows
The directory HelloWorld contains a small code example which can be used as a starting point for a standalone project using AGX Dynamics. To build this example, just follow the steps below:
# create an empty directory
> mkdir c:\temp\myHelloWorld
> cd c:\temp\HelloWorld
:: Configure cmake and create makefiles for the tutorials etc.
> cmake -DCMAKE_INSTALL_PREFIX=%CD% c:\users\username\Algoryx\AGX-2.37.0.0\HelloWorld -A x64
:: Now run make using the created makefiles.
> msbuild HelloWorld.sln /p:configuration=Release /target:BUILD /p:Platform=x64 /p:useEnv=true /m
> Release\HelloWorld
*** Initializing AGX Dynamics...
*** Creating a simulation
*** Creating a RigidBody
*** Simulating
  0.0166667:   0 0 -0.00272407
  0.0333333:   0 0 -0.00817221
  0.05:        0 0 -0.0163444
  0.0666667:   0 0 -0.0272407

  ...

  0.466667:    0 0 -1.10597
  0.483333:    0 0 -1.18497
  0.5:         0 0 -1.26669
  0.516667:    0 0 -1.35114
*** Un-initializing AGX Dynamics...
5.2.2.2. Compiling (without CMake)
If you want to build an application without using the CMake build tool you need to specify a few pre-processor directives:
Path to AGX headers and dependencies (usually <agx-install-dir>/include)
Make sure that the WIN32 macro is defined: /D WIN32
The header file <agx/config.h> contains various settings that were used when AGX was built.
For Visual Studio you need to specify the include path to where the AGX headers are. Select your project and go to Project->Properties (Alt+F7). Specify the path to the include directory of AGX:
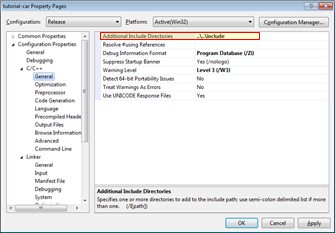
Fig. 5.21 Specify include path for AGX.
5.2.2.3. Linking (without CMake)
First you need to specify the path to where the libraries can be found. Make sure you choose the correct platform (x86/x64):
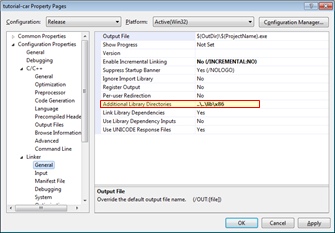
Fig. 5.22 Specify library path.
To be able to link an application to AGX you will at least need the following libraries: agxSabre.lib, agxCore.lib and agxPhysics.lib. The tutorials also require agxOSG.lib, and osg.lib, osgViewer.lib, osgDB.lib (OpenSceneGraph for rendering). Debug version of the libraries has a suffix ‘d’, for example agxSabred.lib. Additional functionality might require additional libraries. Such as Hydraulics, TireModel etc.
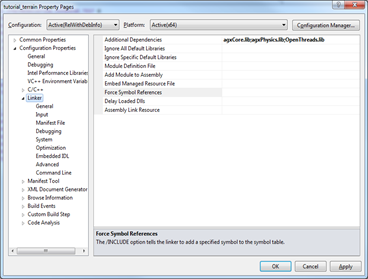
Fig. 5.23 Specifying AGX libraries.
5.2.3. Linux/gcc
To build the tutorials from source code, you need a compiler, development headers and optionally CMake.
The names for required and optional packages depends on which Linux distribution that is used. The lists here are for Ubuntu 20.04 and should be adapted to the Linux distribution/version you are using.
5.2.3.1. Linux tools for building AGX based applications
Package name |
Purpose |
|---|---|
build-essential |
Required. Compiler related dependencies. |
cmake |
Recommended. Simplify generation of project/build files |
cmake-curses-gui |
Optional |
cmake-qt-gui |
Optional |
ninja-build |
Optional. Alternative to make |
clang |
Optional. Alternative compiler instead of GCC |
5.2.3.2. Libraries for building/running AGX binaries
The AGX package bundles some dependencies and expects some to exist with the operating system. Note that some Linux distributions have separate packages for the shared library and the header files needed to compile and use said library.
Buildtime requirements:
Package name |
Purpose |
|---|---|
libgl-dev |
OpenGL Development files |
libglu-dev |
OpenGL Development files |
Runtime requirements:
Package name |
Purpose |
|---|---|
libglu1-mesa |
OpenGL Releated |
libssl1.1 |
Needed for websockets. Some earlier Ubuntu versions use libssl1.0.0 |
libpython3.8 |
Needed for python support. Use libpython3.6 instead on Ubuntu-18.04. |
ttf-mscorefonts-installer |
Recommended. Needed for in-application text to render properly. |
5.2.3.3. Building tutorials on Linux
# create an empty directory
$ mkdir /tmp/agxBuild
$ cd /tmp/agxBuild
# Configure cmake and create makefiles for the tutorials etc.
$ cmake -DCMAKE_INSTALL_PREFIX=/tmp/agxBuild /opt/Algoryx/AGX-2.33.0.0
# Now run make using the created makefiles.
$ make
5.2.3.4. Building HelloWorld on Linux
# create an empty directory
$ mkdir /tmp/HelloWorld
$ cd /tmp/HelloWorld
# Configure cmake and create makefiles for the tutorials etc.
$ cmake -DCMAKE_INSTALL_PREFIX=/tmp/HelloWorld /opt/Algoryx/AGX-2.33.0.0/HelloWorld
# Now run make using the created makefiles.
$ make
5.2.4. MacOS
To build the tutorials from source code, you need a compiler, development headers and optionally CMake.
5.2.4.1. Tools for macOS for building AGX based Applications
Package name |
Purpose |
|---|---|
cmake |
Recommended. Simplify generation of project/build files. Can be installed with Homebrew |
ninja |
Optional. Alternative to make. Can be installed with Homebrew |
clang |
Required. Installed with Xcode Command Line Tools or Homebrew |
5.2.4.2. Building tutorials on macOS
# create an empty directory
$ mkdir /tmp/agxBuild
$ cd /tmp/agxBuild
# Configure cmake and create makefiles for the tutorials etc.
$ cmake -DCMAKE_INSTALL_PREFIX=/tmp/agxBuild /opt/Algoryx/AGX-2.33.0.0
# Now run make using the created makefiles.
$ make
5.2.4.3. Building HelloWorld on macOS
# create an empty directory
$ mkdir /tmp/HelloWorld
$ cd /tmp/HelloWorld
# Configure cmake and create makefiles for the tutorials etc.
$ cmake -DCMAKE_INSTALL_PREFIX=/tmp/HelloWorld /opt/Algoryx/AGX-2.33.0.0/HelloWorld
# Now run make using the created makefiles.
$ make
5.2.5. Executing an AGX application
To be able to run an application build with AGX, you need to specify the path to runtime libraries (PATH, LD_LIBRARY_PATH etc.). See the documentation for your specific platform.
You also need to specify where the components and other resource files, including the license file are located.
This can either be done using environment variables (see Section 45), or through the agxIO::Environment API.
For the Windows operating system, registry entries will be added by the AGX installer. These registry entries will be used whenever an AGX based application is executed.
The initialization of the AGX Dynamics API must be done before creation of any simulation related objects. This is because separate thread storages has to be initialized together with
the underlying simulation framework. Initialization is done by using the function agx::init() and for shutdown agx::shutdown().
5.2.6. HelloWorld.cpp
Below is a small example that demonstrates how to properly initialize AGX and create a simulation with one body.
#include <agxSDK/Simulation.h>
#include <agx/RigidBody.h>

int main()
{
  // ===========================================
  // 1. Specify path to resources
  // ===========================================

  // Where AGX is placed/installed:
  std::string pathToAGX = "c:\\Program Files\\Algoryx\\AGX-2.33.0.0\\";

  // Probably where the license file is
  agxIO::Environment::instance()->getFilePath(
    agxIO::Environment::RESOURCE_PATH).pushbackPath(pathToAGX);

  // Text files for plugins
  agxIO::Environment::instance()->getFilePath(
    agxIO::Environment::RESOURCE_PATH).addFilePath(pathToAGX);

  // binary plugin files
  agxIO::Environment::instance()->getFilePath(
    agxIO::Environment::RUNTIME_PATH).addFilePath(pathToAGX + "/bin/x64/plugins");

  // resource files (textures, models, python scripts etc.)
  agxIO::Environment::instance()->getFilePath(
    agxIO::Environment::RESOURCE_PATH).addFilePath(pathToAGX + "/data");

  // ===========================================
  // 2. Initialization of the AGX Dynamics API
  // ===========================================

  // AutoInit will call agx::init() which must be called before
  // using the AGX API creating resources such as bodies, geometries etc.
  agx::AutoInit init;
  {

    // ===========================================
    // 3. Create simulation content
    // ===========================================

    // Create a Simulation which holds the DynamicsSystem and Space.
    agxSDK::SimulationRef sim = new agxSDK::Simulation;

    // Create a rigid body (no geometry) with default mass etc.
    agx::RigidBodyRef body = new agx::RigidBody;

    // Add the body to the simulation.
    sim->add(body);

    // Set the time step to 1/100 (0.01 s or 100hz):
    sim->setTimeStep(1.0 / 100.0);

    // Simulate for 2 seconds
    while (sim->getTimeStamp() < 2.0)
      sim->stepForward();     // Take one time step.
  }

  // ===========================================
  // 4. De-initialization (shutdown) of AGX
  // ===========================================

  // The destructor for AutoInit will call agx::shutdown() automatically.
  // Unloads plugins, destroys threads etc.

  return 0;
}
5.2.6.1. Specify path to resources
Here we use the agxIO::Environment class to tell AGX where to locate resources.
You are free to use ‘\’ or ‘/’).
Where to locate text/resource files for the AGX Dynamics simulation frameworks (Components):
std::string pathToAGX = "c:/Program Files/Algoryx/AGX-2.33.0.0\";
agxIO::Environment::instance().getFilePath(
      agxIO::Environment::RESOURCE_PATH).push_back(pathToAGX+"/bin/x64/plugins");
Where to locate binary files (.dll/.so):
agxIO::Environment::instance().getFilePath(
      agxIO::Environment::RUNTIME_PATH).push_back(pathToAGX+"/bin/x64/plugins");
Where to find data files such as models, textures, .cfg configuration files etc. Even python scripts will be located here:
agxIO::Environment::instance().getFilePath(
      agxIO::Environment::RESOURCE_PATH).push_back(pathToAGX+"/data");
You need to make sure that the license file (agx.lfx/agx.lic) exists in one of the directories specified for the RESOURCE_PATH. For more information regarding license files can be found in Section 6.1.
5.2.6.2. Initialization of the AGX Dynamics API
The function agx::init() will initialize the AGX API making it possible to create and destroy rigid bodies, constraints etc. One of the important tasks for agx::init() is it initialize the threading system.
This will allow for fast local access of various data per thread.
The number of calls to agx::init() must match the number of calls to shutdown. I.e. if you call init three times, you also need to call shutdown three times before shutdown is actually performed.
Therefore it might be easier to use the agx::AutoInit class that will use the scope of the object variable to call init and a mathing shutdown.
5.2.6.3. Create simulation content
Then the API is initialized it is possible to create objects to build a simulation. See Section 11.
5.2.6.4. De-initialization (shutdown) of AGX
A call to agx::shutdown() should be the last AGX API call that is done. AGX threads will be destroyed together with the possibility to create new objects.
Make sure that all RigidBodies, Constraints, Shapes etc. are all deallocated before a call to shutdown.
Again, using agx::AutoInit() is a good way of getting a structured init/shutdown pair.
5.2.7. Dependencies
AGX Dynamics has several dependencies built as runtime libraries (.dll in windows). Table 5.1 below list the required runtime libraries for executing an application linked against AGX Dynamics under the Windows platform. Depending on which modules are used, more dll-files might be required.
RUNTIME LIBRARY |
DESCRIPTION |
|---|---|
AGXCORE.DLL |
AGX Dynamics core library |
AGXPHYSICS.DLL |
AGX Dynamics core physics library |
AGXSABRE.DLL |
AGX Dynamics sparse blocked solver |
COLAMD.DLL |
Approximate minimum degree column ordering algorithm |
LIBPNG16.DLL |
PNG Image reader |
MSVCP140.DLL* |
Microsoft runtime libraries |
MSVCR140.DLL* |
Microsoft runtime libraries |
VCRUNTIME140.DLL* |
Microsoft runtime libraries |
ZLIB.DLL |
ZLib compression library |
LIBPNG.DLL |
PNG image library |
Table 5.2 lists a few sample optional runtime libraries that might be used depending on the selected functionality in your application. If you use any classes from the agxModel name space, you will for example need to include the agxmodel.dll runtime library. The sample rendering framework utilizes OpenSceneGraph, which will require the files names osg*.dll. The table below is not a complete list of required runtime libraries. For a full list, please see the python script for copying a full runtime environment: Section 5.2.8.
RUNTIME LIBRARY |
DESCRIPTION |
|
|---|---|---|
AGXMODEL.DLL |
AGX Dynamics model library |
|
AGXOSG.DLL |
AGX Dynamics OpenSceneGraph wrapper |
|
AGXPYTHON.DLL |
AGX Dynamics Python wrapper |
|
OSG*-OSG.DLL |
OpenSceneGraph runtime library |
|
OSG*-OSGDB.DLL |
OpenSceneGraph runtime library |
|
OSG*-OSGGA.DLL |
OpenSceneGraph runtime library |
|
OSG*-OSGSHADOW.DLL |
OpenSceneGraph runtime library |
|
OSG*-OSGSIM.DLL |
OpenSceneGraph runtime library |
|
OSG*-OSGTEXT.DLL |
OpenSceneGraph runtime library |
|
OSG*-OSGUTIL.DLL |
OpenSceneGraph runtime library |
|
OSG*-OSGVIEWER.DLL |
OpenSceneGraph runtime library |
Additionally, there is a list of data files required to run AGX Dynamics. These files contains entity and kernel descriptions. Entity is a core part of AGX and describes how data at a low level is stored and handled. Kernels describe execution units which operate on entities.
This data is located in the <agx-dir>/bin/<platform>/plugins/components.
5.2.8. Distributing an AGX Application
If you want to distribute a minimal runtime environment which contain AGX, you need to at least supply the following files:
All files from Table 5.1 (located in
`bin/x64/)Files in
bin/x64/plugins/Components/except forbin/x64/plugins/Components/Webdata/cfg/settings*.*
Note
To distribute an application built with Visual Studio you need to make sure that the Visual Studio runtime libraries are available on the target machine. This can be managed by installing the Visual Studio redistributable package on the target machine. The redistributable package (vcredist_x64_*.exe) can be found either at the visual studio website or in the bin/x64 directory of the AGX Dynamics installation.
There is also a python script that can help you copy the required files (except for the Visual Studio runtime libraries) for running an AGX Dynamics based application.
It is located at: <agx-dir>/data/python/utilities/copy_runtimes.py*
Depending on your specific use of AGX Dynamics, some of the runtime libraries will not be needed. It is up to you to choose only the ones that are required for your use.
The python script uses one argument: a non-existing directory that will be created and filled with the required runtime files. In the example below, the directory c:\temp\agx_runtimes will be created and all the required runtime files will be copied to that directory.
python c:\Users\username\AppData\Local\Algoryx\AGX-2.33.0.0\data\python\utilities\copy_runtimes.py c:\temp\agx_runtimes
5.3. Threads
AGX Dynamics is inherently multi-threaded. During runtime a pool of execution threads are utilized for various tasks. The number of threads are specified using the function agx::setNumThreads(n).
The number of threads can be changed during simulation. By default 1 thread will be used. A general recommendation is to use more than one thread, but not more threads than there are hardware cores.
One approach is to read out the number of cores:
/**
Limit core usage to number of physical cores.Assume that HT / SMT is active
and divide max threads with 2.
*/
const agx::UInt numCores = agx::SystemInformation::getNumCpu();
agx::setNumThreads(numCores / 2 - 1);
It is worth noticing that the call to agx::SystemInformation::getNumCpu might return the number of hyper-threads (if enabled in BIOS) which can be twice as many as the actual number of hardware cores.
Depending on the type of simulation the scalability of using more cores will vary. A tightly coupled simulation of one vehicle with many constraints/rigid bodies will not scale with more threads as well as a granular simulation with hundreds of thousands of granular bodies. AGX Dynamics has many tasks that can run in parallel, such as collision detection, integration, solvers etc. So one should usually see performance improvement using two threads over one, but at some point adding more threads will not improve performance.
If you are going to use the AGX Dynamics SDK in threads not created by AGX you need to make sure that you promote the thread to become an AGX thread. Reason is resource management. Some API calls will assume that the local thread has data that can be utilized. This is for performance reasons.
Therefore if you create a thread with std::thread or any other threading library you must promote the thread by registering it as an AGX thread using agx::Thread::registerAsAgxThread().
It is important that you also unregister the thread before the thread is destroyed.
Below is an example that will use AGX API to load a mesh from disk in a separate thread:
#include "agx/agx.h"
#include <thread>
#include <agx/Thread.h>
#include <agxUtil/TrimeshReaderWriter/TrimeshReaderWriter.h>

/// Class that loads a mesh from file
class CreateTrimesh
{
  public:
    CreateTrimesh(const std::string& path) : m_path(path) {}
    void execute()
    {
      m_mesh = agxUtil::TrimeshReaderWriter::createTrimesh(m_path);
    }

    agxCollide::TrimeshRef getMesh() { return m_mesh; }

  private:
    agxCollide::TrimeshRef m_mesh;
    std::string m_path;
};

void execute(CreateTrimesh* creater)
{
  // Promote the thread to become an AGX thread
  agx::Thread::registerAsAgxThread();
  creater->execute();

  // Before we leave, unregister the thread!
  agx::Thread::unregisterAsAgxThread();
}


int main(int argc, char *argv[])
{
  agx::AutoInit agxInit;
  CreateTrimesh creator("models/box.obj");

  // Start the thread that loads the mesh.
  std::thread t1(execute, &creator);
  t1.join();

  std::cerr << "Num vertices: " << creator.getMesh()->getMeshData()->getVertices().size() << std::endl;
}
5.4. Reference pointers
AGX use a reference pointer system for all objects allocated on the heap. Reference pointers are a special kind of pointer that can only point to objects derived from agx::Referenced. A Referenced object keeps track of the number of reference pointers pointing to it. Whenever an instantiated class derived from Reference discovers that the number of referencing points is zero, it will automatically be de-allocated.
There are two types of reference pointers in AGX, ref_ptr and observer_ptr. ref_ptr is a strong pointer, which will during its lifetime keep the referenced object from being deleted. An observer_ptr on the other hand, will be notified when the referenced object is de-allocated. ref_ptr and observer_ptr both has a method isValid() that return false if it is pointing to a deallocated object. The type-cast operator is overloaded, so a ref_ptr<A> and observer_ptr<A> can be used anywhere in the code, as if it was of type A *. Example:
struct A : public agx::Referenced
{
};
agx::ref_ptr<A> a;
A* aPtr = a; // Ok, as the reference pointer will be cast to a A*
There are a few pitfalls when using reference pointers, an example:
// Problem #1: Local ref_ptr going out of scope
A* createA()
{
agx::ref_ptr<A> aRef = new A;

// When this function returns, aRef will go out if scope and the
// memory be deallocated. The number of reference pointers pointing to
// this object is decremented to zero, and it will be deallocated.
// So we are returning an invalid object!
return aRef;
}
In the above example one should either change the return type of the function to return an agx::ref_ptr<A>, or avoid using a ref_ptr inside the function. The latter solution will however be a potential memory leak, because memory will not be freed if an exception is thrown inside createA().
5.5. Math classes and conventions in AGX
There are numerous classes related to math operations and conversions in AGX. This chapter tries to describe the conventions used for these classes. agx::Real is the data type used for all floating point operations in AGX. Common for all rotations is that radians are used for all methods. agx:degreesToRadians() and agx::radiansToDegrees() can be used to convert between degrees and radians. The header file <agx/Math.h> contains utility methods related to math operations such as:
absolute( a ) |
Return absolute value of argument. |
equivalent( a, b ) |
Return true if the two arguments are equal. |
equalsZero( a ) |
Return true if argument is equal to zero. |
minimum(a, b), maximum(a, b) |
Return minimum or maximum of the two arguments. |
clamp( a, min, max ) |
Return clamped argument a below min and max. |
square( a ) |
Return square of a. |
signedSqare( a ) |
Return squared argument a. |
clampAbove( a, minimum ) |
Return clamped argument above minimum. |
clampBelow( a, maximum ) |
Return clamped argument below maximum. |
sign( a ) |
Return sign of argument. |
5.5.1. Small vectors
Vec2, Vec3 and Vec4 are vectors for storing points and vectors in 2, 3 and 4 dimensions. Each method has methods for dot product, cross products and overloaded operators for +,-, scalar operations such as *, / etc.
5.5.2. Transformations: agx::AffineMatrix4x4
This is a 4x4 matrix that can store a concatenated rigid rotation and translation. It is stored in row order:
\(R_x0\) |
\(R_x1\) |
\(R_x2\) |
0 |
\(R_y0\) |
\(R_y1\) |
\(R_y2\) |
0 |
\(R_z0\) |
\(R_z1\) |
\(R_z2\) |
0 |
\(T_x\) |
\(T_y\) |
\(T_z\) |
1 |
A vector-matrix multiplication is performed as: vM= M*v and its transpose is calculated as vM’=v*M.
The AffineMatrix4x4 is always considered to be orthonormalized, which means that the call to AffineMatrix4x4::inverse() will perform a transpose, as the transpose of a orthonormalized matrix is the same as the full inverse of the same. An AffineMatrix4x4 should never contain scaling or shearing, only rigid transformations.
5.5.3. Representing rotations
5.5.3.1. agx::OrthoMatrix3x3
This is a rotation matrix with the same conventions and methods (except everything related to translation) as the AffineMatrix4x4.
\(R_x0\) |
\(R_x1\) |
\(R_x2\) |
\(R_y0\) |
\(R_y1\) |
\(R_y2\) |
\(R_z0\) |
\(R_z1\) |
\(R_z2\) |
5.5.3.2. agx::Quat
Quaternion is a compressed representation of a rotation based on a vector and a scalar: q = [<x, y, z>, w], where <x, y, z> is a three dimensional vector and w is a scalar. Quaternions can be interpolated using linear interpolation: agx::lerp(t, q1, q2) or spherical linear interpolation: Quat::slerp(t, q1, q2);
5.5.3.3. agx::EulerAngles
EulerAngles is a more intuitive way of specifying rotations, as rotations can be specified per axis. There are 24 different conventions for representing rotations in Euler. This class can convert back and forth between all representations. Most classes can convert between the different rotation specifications.
5.6. Evaluation of AGX Dynamics
5.6.1. Running tutorials
The pre-built tutorials reside in the bin directory. They can be started from windows explorer just by clicking on them. Paths are setup so that the executables will look for data in the data directory.
Running applications linked to AGX without having setup the runtime environment (PATH) will lead to an application crash.
If you suspect that one more dll files are missing, use the depends tool from Microsoft (freely available on their website):
depends tutorial_basicSimulation.exe
It will give you a list of all the required runtime files necessary for running the application. It can also be run on a dll file:
depends agxPhysics.dll
which lists all the runtime dependencies for AGX main library.
5.6.2. Testing performance
- When testing performance of a physics engine, it is important to remember the following things:
Do not run with graphics. The agxOSG library will not run AGX in a thread separate from the graphics. To achieve this use the –-agxOnly (-a) argument with agxViewer. For example:
> agxViewer tutorial1_graphics.agxPy --agxOnly --stopAfter 10The above command would load and run tutorial1_graphics.agxPy without graphics for 10 seconds and stop and report the time it took to run the simulation.
Do not use more threads than you have actual execution units on your CPU (cores). On some systems hyperthreading is enabled. This means that you will see more cores than what the hardware actually have. Hyperthreading works well with “light threads”, which does not do intensive float/calculations. You will notice a very uneven performance in AGX if you enable too many threads. What will happen is that you will spend a lot of time scheduling threads in and out of the cores leaving less time for actual calculations. This means that calling agxViewer –numThreads 10 will certainly NOT run faster than –numThreads 2 on a two core machine.
Make sure that the machine is idle before starting your testing.
5.7. agxOSG – Binding to a rendering engine
Section 42.1.4 documents keybindings for the applications built using the agxOSG::ExampleApplication framework. The ExampleApplication is a collection of utilities found in the agxOSG directory as source. This can work as an example of an integration of AGX into a rendering engine (www.openscenegraph.org). agxOSG is mostly for internal use at Algoryx and is not very well documented.
Worth noticing is that rendering and simulation is executed from the same thread This means that if you want to measure the performance of AGX Dynamics only, you should run the tutorial/application without interactive graphics. This can be done for example through the arguments through the agxOSG::ExampleApplication class which all of the tutorials and AGXViewer is based on:
cmd> tutorial_customConstraints --scene 1 --stopAfter 10 --agxOnly --timeStep 0.01 --numThreads 2
- The above command would do the following:
start the application tutorial_customConstraints
load scene 1 as defined in the application (–scene 1)
run the simulation for 10 seconds (–stopAfter 10)
Run as fast as possible with no graphics/window (–agxOnly)
Use a time step of 100hz (–timeStep 0.01)
Allocate and use two threads for AGX solver etc. (–numThreads 2)